Contributed by Emily Kane
Making jelly has been a fun hobby of mine for over 20 years. I love sharing jelly, and canning jellies is a straightforward process.
Since Mustang grapes grow wild in many parts of Texas, they are a great place to start. You can find them found blanketing old fence lines, and climbing up trees and power lines along roadsides. They ripen as early as mid-June and can be picked through August and you’ll know a ripe berry from its thick skin and deep dark purple color. It is recommended to pick and handle them wearing gloves to protect your skin from the high acidity of the juice. As well, it is not recommended to eat them straight off the vine.
This may sound like a negative, but in the world of jelly making, acidity levels are a positive in creating a beautiful firm jelly.
My jelly recipe requires only three ingredients, including grapes you want to pick early in the season, and no pectin, which saves money.
The key to not needing pectin is making sure that one-fourth of the grapes are unripe; the firm green grapes growing alongside the ripe purple ones. Unripe grapes contain a high amount of natural pectin. I use scissors to cut them off the vine in bunches, which makes them last longer.
MAKE THE JUICE
- Remove stems and leaves, then rinse with clean water.
- Fill a thick deep pot half full of the grape combination (3/4 ripe, 1/4 unripe). This doesn’t have to be exact, it’s more of a guesstimate to your actual ratio of ripe to unripe grapes, but it is okay to guess or measure out.
- Fill the pot with grapes and enough water to cover them.
- Bring the water to a boil then lower the temperature to a simmer; this cooks the grapes.
- While grapes are cooking, use a potato masher to mash them. When done, grapes will look like a soup.
- Strain the juice. My preferred method is to use a few layers of cheesecloth over a strainer placed into a large bowl. I rest my strainer on a mug to elevate it and allow more space for the juice to filter into the bowl.
Another way is to use a fine mesh strainer instead of cheesecloth. If you use a fine mesh strainer, you may need to strain the juice twice to filter out debris (grape skin, twig, seeds, etc.). - Allow the cooked berries to strain. Cover in plastic wrap and leave on counter or place in fridge.
Allowing to strain overnight allows you to harvest the most juice and the last bit will be thicker with a rich quality.
Now that you have the juice, you make the jelly.
MAKING THE JELLY
In a heavy pot, bring 5 cups of juice and 7 cups of sugar to a boil, stirring often. Reduce to medium to keep it to a boil and prevent it from boiling over.
Note: At this point, if you were unable to use one-fourth unripe grapes, add one pack of pectin after the mixture reaches boiling point, allow it to boil for one minute and then remove from heat.
The jelly is done when the temperature reaches 220°F, this can be checked by using a candy or jelly thermometer. If your recipe included unripe grapes, the surface and color of the jelly will have a smooth, dark look.
Another way to tell when it is done is to cool some on a spoon and see how it drips off the spoon. When the jelly has jelled, a drop will hang on the spoon.
STORING THE JELLY
If you know you are going to use it right away or gift to family and friends who will use it soon, there is no need to can it. Use a container with a lid and store in fridge.
If you want to keep some year-round or gift it throughout the year, this is where canning your jelly comes in handy. The shelf life of canned jelly is over a year.
- Sterilize your jars in boiling water and dry them before using them.
- Pour hot jelly into sterilized jars.
- Wipe the jar rim clean with a clean damp wash cloth or paper towel.
- Place clean lids on the jar and put the rings on, finger-tight and seat the jars using the water bath method.
WATER BATH
- The water bath should be at a boil before the jars are lowered on the rack into the water. The water level needs to cover the jars by at least two inches.
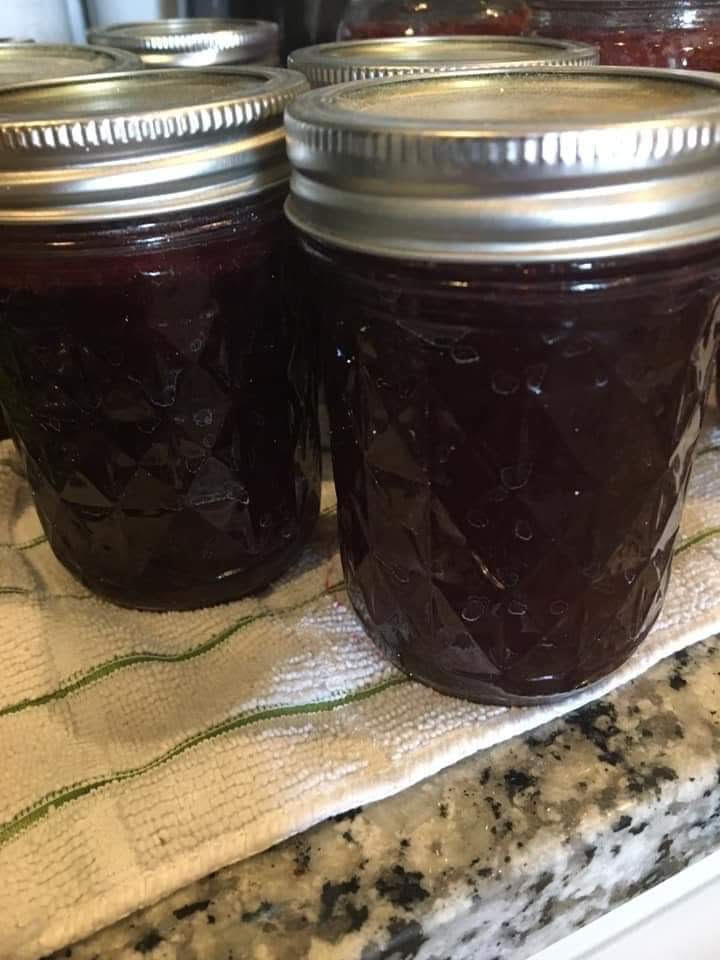
- The jars need to be in the boiling water bath for 5 minutes. Remove them from the bath and allow them to cool on a towel for 12 to 24 hours before moving them
- The jars should seal. You will hear “pings” as the jars make their seal.
CLEAN AND LABEL JARS
The last step is to clean and label your jars of Mustang jelly.
Fill clean sink with warm soapy water. Remove the rings, leaving the lids on the jars, and submerge the sealed jars upright in the soapy water. This cleans the outside of the jars and helps detects false seals. The lid should be firm and not move up and down when you press on it. If you discover jars didn’t seal, place those jars in your fridge to use first.
Rinse off soap, dry the jars and rings. Put the rings on and label the jars.
The date jelly was made and name of jelly can be easily written with a permanent marker on the lid. A good thing to do is make a label with the name and ingredients. This is an important step if you are gifting in case your recipients have food allergies.
My last word of advice is don’t be afraid of failure. If the jelly doesn’t get firm, there are ways to use it. You can try boiling and canning it again, use the juice as a syrup, or as a fruit juice concentrate (just add water until it tastes like grape juice). Happy jelly making, and good luck.
Check our Food section for pie!